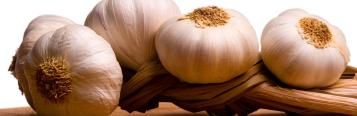

Plaiting garlic is a practical way to organise and store your homegrown crop once it has been properly cured. A garlic plait keeps the bulbs within easy reach when you’re cooking and looks great hanging in the kitchen, pantry or shed alongside plaited onions and strings of dried chillies.
Softneck garlic is the best choice for plaiting because its flexible stems can be braided more easily than the firm central stems of hardneck varieties. Follow these simple steps to turn your harvest into a neat and useful garlic plait.
How to plait garlic
1. Choose the right garlic
Softneck garlic varieties are the easiest to plait because their stems remain relatively flexible after curing. Hardneck garlic develops a rigid central stem, so it is better stored in loose bunches or mesh bags.
2. Harvest the bulbs carefully
Garlic is generally ready to harvest when several of the lower leaves have dried and turned brown, while some upper leaves remain green. Check one bulb first to make sure it has formed distinct cloves.
Use a garden fork or spade to loosen the soil around the bulbs, then lift them carefully. Avoid pulling garlic directly by its stems, as this may damage the bulb or weaken the stem needed for plaiting. Gently brush away loose soil, but do not wash the bulbs.
3. Cure the garlic thoroughly
Leave the stems and leaves attached and arrange the garlic in a single layer on a rack or hang it in small bunches. Place it in a dry, airy position away from direct sunlight for around four to six weeks. Good airflow is especially important in warm or humid conditions.
The garlic is ready for plaiting when the outer skins, roots and stems feel completely dry. Set aside any damaged, soft or diseased bulbs to use promptly rather than adding them to the plait.
4. Clean the cured bulbs
Wear gloves and gently brush away any remaining dry soil and very loose outer skins. Use clean, sharp secateurs or scissors to trim the roots close to the base, taking care not to cut into the bulbs. Leave the dried stems attached.
5. Arrange the first three bulbs
Place three bulbs on a flat surface with their stems extending away from the bulbs. Position one bulb in the centre and the other two slightly below it, one on each side. Cross the stems so they form three sections for braiding, then secure the bulbs together with garden twine.
6. Begin the plait
Start braiding the three sections as you would braid hair. Cross the stem on one side over the middle section, then cross the stem from the opposite side over the new middle section. Keep the braid firm enough to hold its shape without snapping the dried stems.
7. Add more garlic bulbs
Add another bulb beside the existing bulbs and group its stem with the section closest to it. Continue braiding, adding another bulb every few crosses and alternating between the left, centre and right sections.
Keep the bulbs sitting close together as you work. Depending on the size of the bulbs and the strength of the stems, around 10 to 12 bulbs can create a generous plait that is still easy to handle.
8. Plait the remaining stems
Once all the bulbs have been added, continue braiding the loose stems until you reach the end. If the stems become brittle while you work, handle them gently rather than pulling them tight.
9. Secure and hang the plait
Tie the end securely with garden twine and create a loop for hanging. Store the finished garlic plait in a cool, dry, dark and well-ventilated place. Check the bulbs occasionally and remove any that begin to soften, sprout or show signs of mould.
If you need more advice on planting, caring for and harvesting your own crop, explore our comprehensive garlic growing guide.
Why plait garlic?
Plaiting keeps cured garlic bulbs organised while allowing air to move around them. It also saves bench and shelf space, and makes it easy to remove one bulb at a time when you need it.
How long garlic stores will depend on the variety, how well it was cured and the storage conditions. Properly cured garlic kept somewhere cool, dry and well ventilated will generally store better than bulbs exposed to warmth, moisture or direct sunlight.
A garlic plait is also a great way to display the results of your time in the garden. With its mix of creamy white, purple and papery tones, it brings a relaxed, homegrown look to the kitchen while keeping your harvest close at hand.