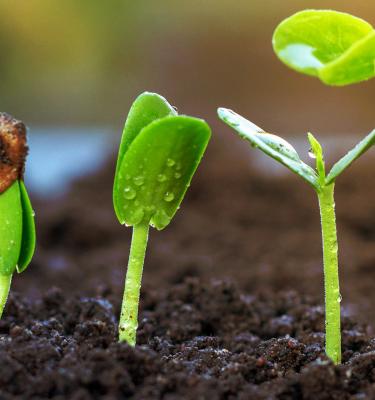
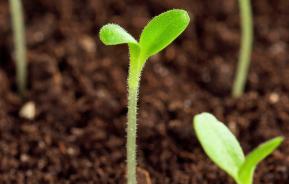
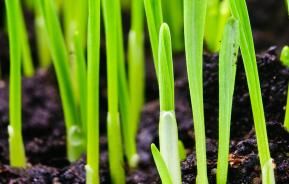
Germination is when a seed comes out of dormancy. The first stage is when the seed begins to take in water. As it does so, it grows bigger and produces enzymes that increase its metabolic activity and break down its food store to provide energy. As the seed grows, the first stage of the root emerges. Once the first little shoot and the first leaves emerge, the process of photosynthesis starts.
Benefits of planting from seeds
There are so many benefits of growing from seed, you may choose to start planting and growing flowers and vegetables at home rather than buying them fully grown from a supermarket.
Growing from seed is a much cheaper way to grow organic food, and you’ll always know exactly where your food has come from. If you first sow your seeds indoors you can also start the enjoyment of the growing process much earlier. And once you transplant them outside you’ll get to watch your garden grow right before your eyes.
You’ll also find there are so many different varieties of seed available – hundreds of species are only available in seed form – compared to starter-plants, plugs or cuttings. This gives you the opportunity to experiment more with many types of fruit and veg that you wouldn’t be able to buy from the supermarket.
Guide to germinating seeds
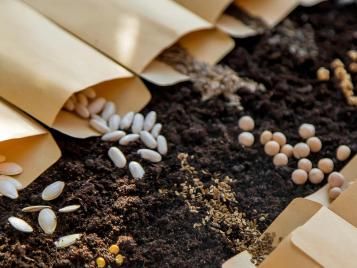
1. Buy your seeds
One of the great perks of growing your own plants from seed is the fact that you’ll have so many to choose from. Try looking online or in garden centres and you’ll be able to find the perfect seeds to suit you and your garden. Remember to pay attention to the requirements of the seed. Look for the water requirements, soil temperature, and light needed to germinate the species you consider.
Read our guide to know more about how to grow your own food.
2. Learn how to sow your seeds
Once you’ve got your seeds you will need to sow them. Instructions will be found on seed packets, catalogues or online about when, how and where to sow. Some seeds can be sown directly into your garden soil but others will need sowing in containers indoors to start with and transplanting once they are stronger and the weather conditions are right. This decision depends hugely on what you are growing as some seeds will require more sensitive care than others.
Some seeds can be sown directly into your garden soil especially those that hate root disturbance. Always prepare your soil first though, raking and removing stones and weeds and add some organic matter too. These seeds will need more care during germination so always keep an eye out for pests such as slugs and snails. In many cases it can be safer to start your seeds off indoors in seed and cutting compost using warm windowsills or a propagator.
Read our guide to know more about how to start growing your own fruit and vegetables.
3. Pick your container
Use small pots, seed trays or modular trays and seed compost to start your seeds off making sure they are clean. Once they have germinated and developed their first true leaves they can then be transplanted onto larger containers with potting compost to provide further nutrients and room to grow.
Check your seed packet for sowing instructions. Generally you can ¾ fill your seed container and then water it before sowing seeds on top and lightly covering with a sprinkling of compost. Some seeds have particular requirements such as light, no light, cold treatment, soaking or no water. This should be specified on the pack.
Read our guide to know more about growing fruit and veg in containers.
4. Time it right
Normally you should sow your seeds between 4-6 weeks prior to moving them outside but this time frame is really dependent on germination, seedling development and weather. The seed packet will guide you on suitable sowing times and when you can transplant to outdoors. All seeds sown indoors will need to be hardened off before permanently staying outside. This means putting them outside somewhere sheltered and out of direct sunlight during the day and then bringing them in again at night. Do this for 7 to 10 days.
5. Provide heat and lighting
You may need a source of heat and light to give your seedlings a good start. Windowsills are a good spot to start with, but seedlings may get elongated if they aren’t getting enough light. You can buy special grow lights to keep your seeds happy indoors. A heat mat or heated propagator is also a good idea for plants that require extra heat such as tender veg and flowers.
Alternatively if you have one, a heated conservatory or greenhouse is ideal.
6. Keep the potting mix moist
We suggest covering your container lightly with a see through covering such as a plastic lid or sheeting. This will act as a way to regulate and trap moisture and temperature. This is important because if your seeds dry out they will not germinate properly.
Once you see the first shoot poking through, you will need to remove the covering and place the container into a bright area. The room temperature should ideally be above 17°C and the container should be in bright light but not direct sunlight. Don’t allow the compost to dry out but avoid soaking. Try to use room temperature water for your seedlings.
.jpg)
7. Transplant seedlings
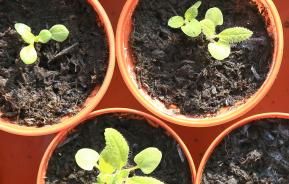
Once your seeds have germinated and are beginning to grow, you will need to give them room and nutrients to grow by pricking them out and potting them on into fresh potting soil. Wait until they have their first pair of ‘true’ leaves, then you can transplant them into modular trays or small pots so they can grow strong enough to be planted out when the time is right.
Now you’ve mastered how to germinate seeds, sign up to our newsletter for more gardening advice and tips from the experts right to your inbox, to expand your gardening know-how.
